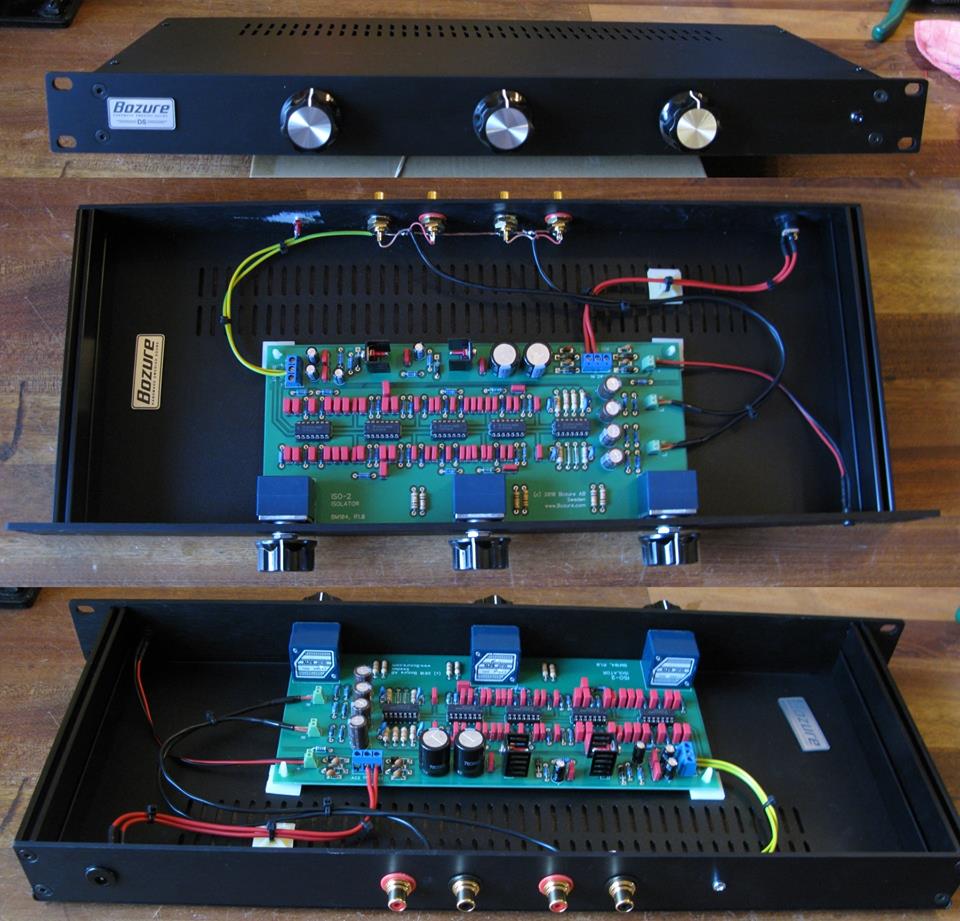
How to ”build” a 19″ Isolator using the Bozure ISO-2 Built & Tested PCB in a standard enclosure not using the CNC processed front and rear panel option.
1: Drill the 4 holes on the front panel and the 6 on the rear panel.
2: Attach ISO-2 PCB to front panel.
3: Add LED on front panel + RCA connectors, DC jack and ground screw on rear panel.
4: Add audio, AC and ground wires, on rear panel you need to solder them to the connectors after they are added to the panel..
5: Add the Bozure badge and the potentiometer knobs on the front.
Done !